Empty Pipes
ES6 Modules using Webpack and Gulp
Overview
One of the most common scenarios I run into when creating javascript applications is the following.
-
I start working on some application (let’s call it
foo). -
I start working on a different program (let’s call it
bar) and need some of the functionality that I already implemented infoo.
In python, accomplishing this is trivial by placing the source files in the same
directory and saying import foo. In javascript, it’s a little more
complicated. Rather than recapitulate a lot of existing documentation about the
different ways that one can implement modules in javascript (CommonJS, AMD,
etc…), I’ll just dive into how I use gulp and webpack to take advantage
of the ECMAScript 6 syntax for
modules to create
reusable javascript components.
Goal
The goal of this project is to create two components: foo and bar. foo
will export a function called drawCircle that we can import into bar. bar
will then draw a rectangle on top of the circle.
Here’s the code for app/scripts/bar.js
import d3 from 'd3';
import {drawCircle} from 'foo';

export function drawRectangleAndCircle(divName) {
    drawCircle(divName);

    d3.select('svg')
    .append('rect')
    .attr('x', 75)
    .attr('y', 75)
    .attr('width', 100)
    .attr('height', 100)
    .classed('bar-rectangle', true)
    .attr('opacity', 0.7)
}
And the relevant code from app/index.html which uses bar.js:
 <!-- build:js scripts/bar.js -->
  <script src='scripts/bar.js'></script>
  <!-- endbuild -->

  <script type='text/javascript'>

  bar.drawRectangleAndCircle('#circle');

  </script>
In order for all of this to function, we need some tools to manage
which modules we have installed (npm), resolve the import statements (webpack),
translate the es6 to more universally understandable es5 (babel) and to build
everything into one package (gulp). The easiest way to get started is to use
yeoman to scaffold out the application. To install yeoman,
simply use npm:
npm install -g yo
Then, install the generator for this tutorial:
npm install -g generator-gulp-webpack-es6
Setting up foo
Create a directory to host the foo module and scaffold it out:
mkdir foo
cd foo
yo gulp-webpack-es6
When yeoman asks for Your project name:, make sure to enter foo:
You can just use the default values for the other fields. The default values for author
name and email address are taken from your ~/.gitconfig if you have one.
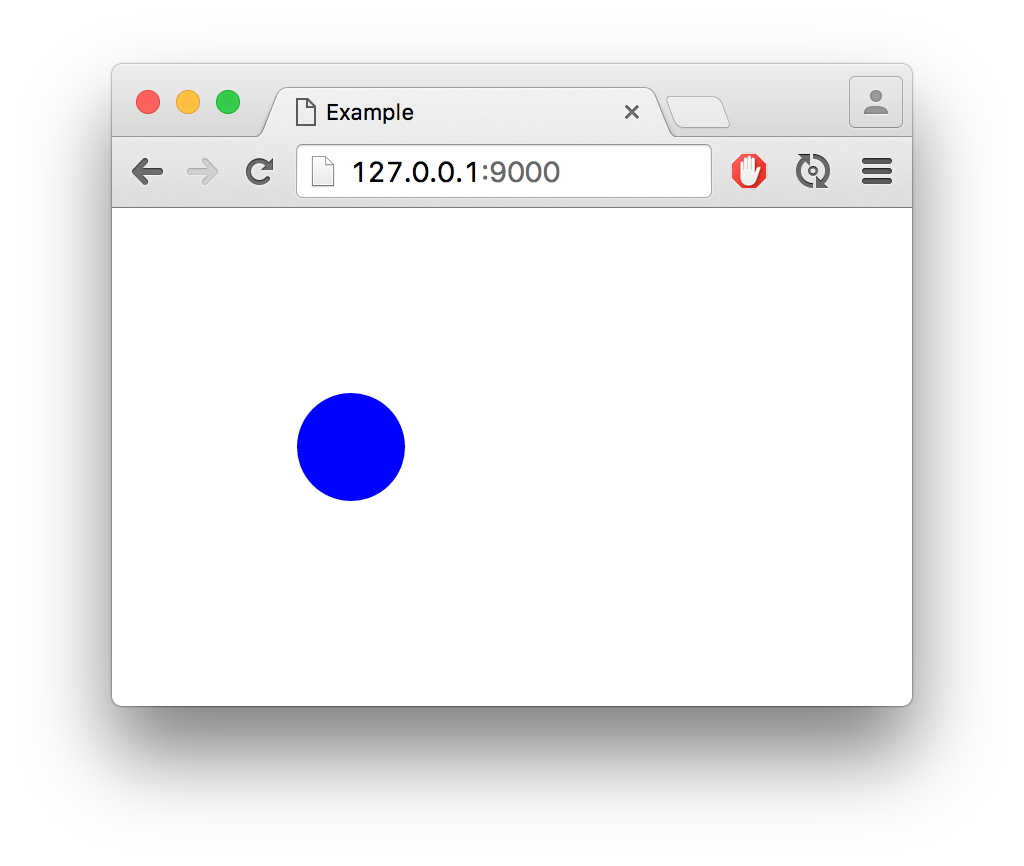
That’s it. We now have a module which simply draws a circle in the browser. Witness it in all its glory by running:
gulp serve
And pointing your browser to 127.0.0.1:9000. The result should look like this:
Now, we want to install this package locally so that we can import it from our
soon-to-be-created package bar. To do this we need to make one minor change
to our webpack.config.js by adding the following lines:
  externals: {
      "d3": "d3"
  },
These are necessary to tell webpack not to include d3 in the packaged file. Under
normal circumstances this wouldn’t be necessary but if I omit it and use npm link
as described below, I get the following error:
Uncaught TypeError: Cannot read property 'document' of undefined
It’s seems like it happens either because webpack adds a use strict;
somewhere in the bundled foo package, or because d3 is included in both foo
and bar. In either case, specifying that it’s an external package seems to
resolve the problem.
To build and install foo so that it can be imported by other modules, just
run the following two commands.
gulp build
npm link
The first will compile the code into a single javascript file and the second
will install it as a global module on the local computer. From now on, whenever
we need to make changes to foo we just need to run gulp build and they
will be reflected in every local package that uses foo.
Setting up bar
To create the calling package bar we follow a very similar procedure:
mkdir bar
cd bar
yo gulp-webpack-es6
When yeoman asks for Your project name:, make sure to enter bar. You can
use the default values for the other fields.
Now because we want to use the functionality provided in foo, we need to
install it:
npm link foo
Adn then we need to modify app/scripts/bar.js and have it implement
its own functionality:
import d3 from 'd3';
import {drawCircle} from 'foo';

export function drawRectangleAndCircle(divName) {
    drawCircle(divName);

    d3.select('svg')
    .append('rect')
    .attr('x', 75)
    .attr('y', 75)
    .attr('width', 100)
    .attr('height', 100)
    .classed('bar-rectangle', true)
    .attr('opacity', 0.7)
}
And finally we need to change the <script> code inside index.html to
call the newly created function from bar:
<script type='text/javascript'>

bar.drawRectangleAndCircle('#circle');

</script>
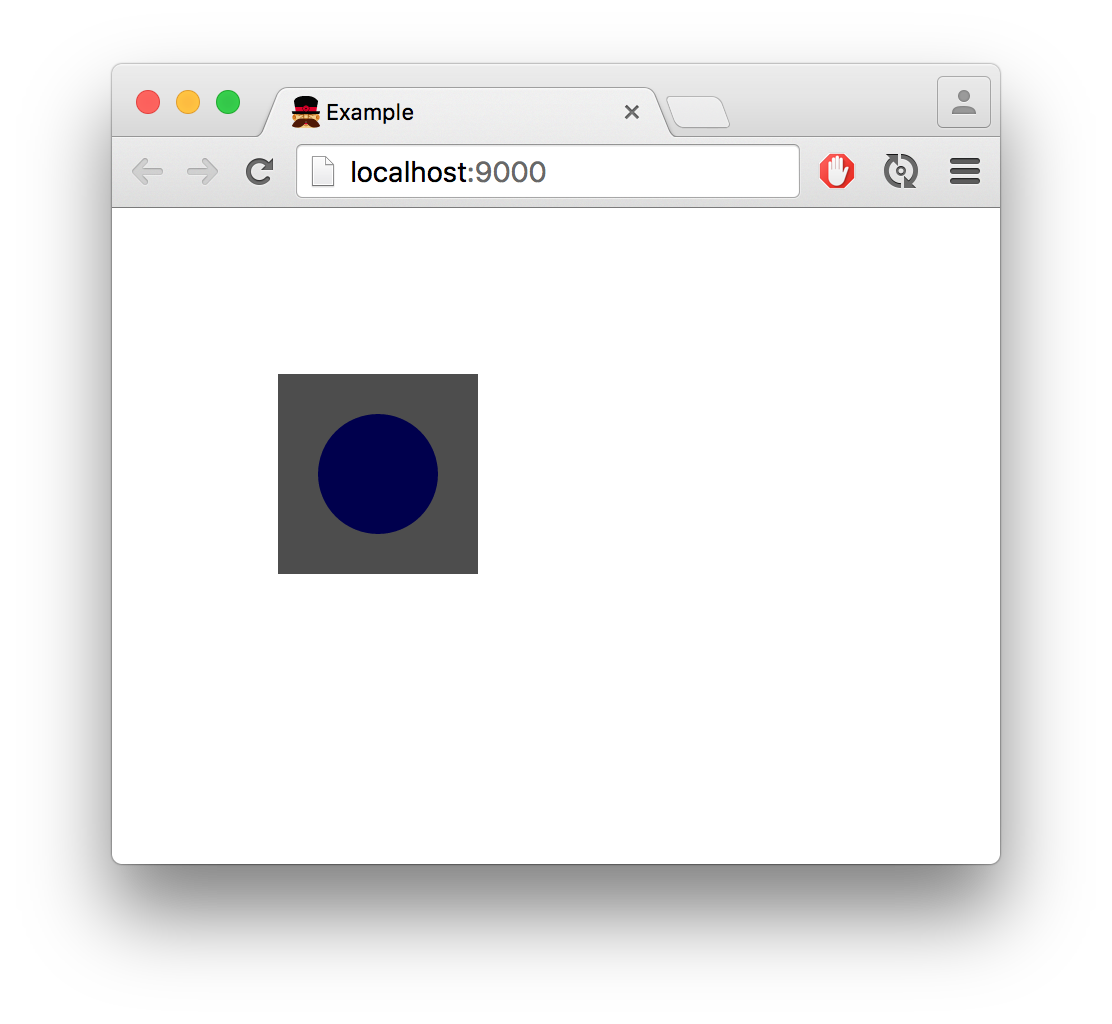
If everything worked as it should, running gulp serve should show a lovely
circle / square combination:
Generator directory structure
The directory structure of the componenets generated using gulp-webpackes6
is organized so that the configuration files are in the root directory, all of
the code is in the app subdirectory, unit tests are in test and the compiled
javascript is in dist:
.
├── app
│   ├── index.html
│   ├── scripts
│   │   ├── foo.js
│   │   └── helper_module.js
│   └── styles
│       └── foo.css
├── bower.json
├── dist
│   ├── index.html
│   └── scripts
│       └── foo.js
├── gulpfile.babel.js
├── package.json
└── webpack.config.js
Changing the module’s name
The default module is created so that the main file is in
app/scripts/module_name.js where module_name is the name given in the
generator questionnaire. To change it to something else, you can either re-run
the generator or make the following changes:
- Rename
app/scripts/module_name.js - Change occurences of
module_nameinapp/index.html - Change the
entryline inwebpack.config.js
Largest Ski Areas On Each Continent
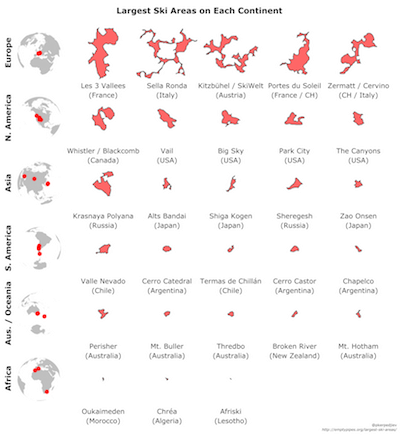
The chart below shows the five largest ski areas on each continent (except Antarctica). Africa only has three entries because those are the only ski areas I found with annotated ski lifts and slopes. Everything is calculated according to some reasonable yet arbitrary heuristics so please take the rankings with a grain of salt. If you click on a ski area, it will be displayed in the map below.
The Map
All the ski areas in the chart above are annotated on the map below. Clicking on an area above centers the map below.
How it’s made
Each ski area is defined by something like an alpha shape, calculated over all the lifts and slopes. Each “alpha shape” -like area is calculated by first creating a Delaunay triangulation of all ski lift and slope waypoints. Every triangle which has a side greater than 1km is then removed. The result is a set of disconnected shapes all composed of multiple triangles. Each aggregation of triangles is what I consider a ski area.
In some cases, this can lead to two ski resorts being connected even though you might have to walk up to 1km to get from one lift to another (e.g. Kitzbühel / SkiWelt above). In the opposite case (e.g. Oukaimeden), a long lift may not be counted simply because the points defining it create degenerate triangles. Nevertheless, in most cases the shapes created reflect the ski areas they represent quite well.
Here’s the recipe to re-create the graphic:
- Download OpenStreetMap dumps of each continent
- Filter for lifts and slopes
- Sample points along long segments to make sure they’re not split
- Calculate a Delaunay triangulation of all the OSM nodes and the sampled points
- Exclude all triangles which have an edge longer than 1km (concave hull of sorts)
- Polygonize
- Google the towns near the resorts to figure out what the resorts are called
- Convert to topojson and downsample to reduce the size
- Make table using d3.js
- Create zoomable map using leaflet.js and a d3.js overlay
Questions? Comments? Twitter (@pkerpedjiev) or email (see about page).
Never Take The First Option
The King’s Jewels Problem
A long time ago, the story goes, a hero rescues the king’s life. The elated king promises the hero one of his crown jewels as a reward. He takes out his bag of treasures and tells the hero to reach into the bag and randomly choose one. If he likes it, he can keep it. If he doesn’t, he can throw it aside and lose it forever. The hero, greedy as he is heroic, naturally wants to pick the best jewels. Looking at the bag, he judges there to be about 10 jewels inside. He stops to ponder for a second.
How should the hero proceed to maximize his chances of scoring the best jewel in the bag?
Should he just take the first one he picks or should he look at a few before deciding on one to keep? If so, how many?
We could try to answer this question analytically, but since “data science” is all the rage, why not try and answer it stochastically? If we simulate the hero’s choices, we should be able to come up with some numerically-grounded recommendation for what he should do.
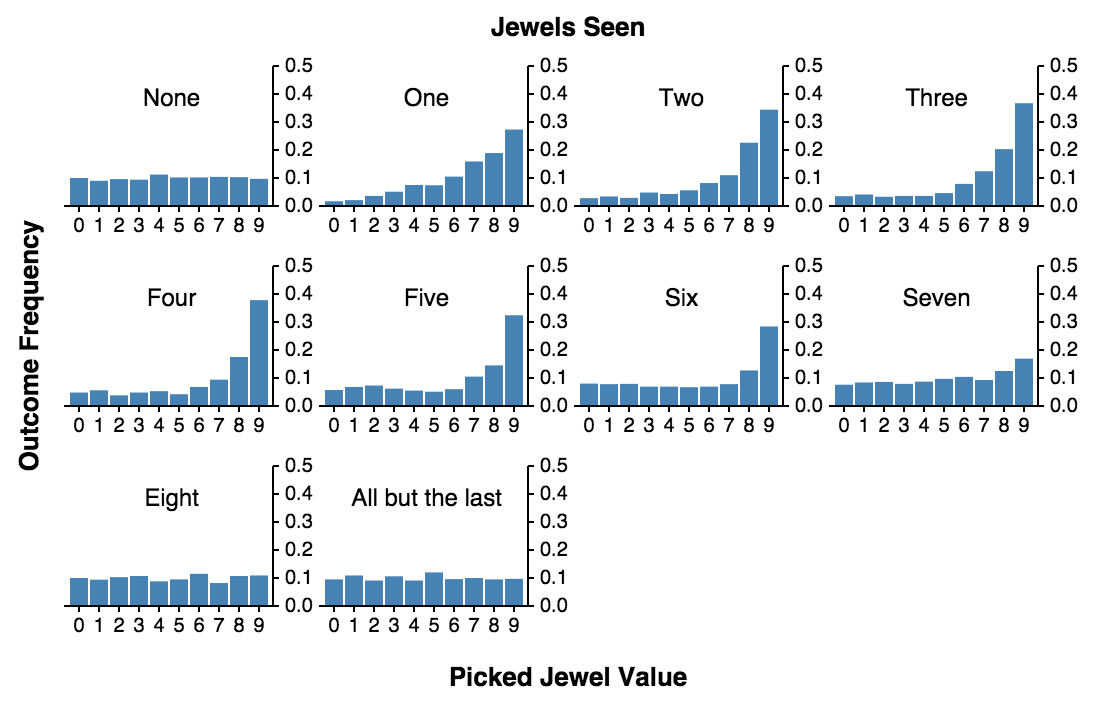
Let’s assume a simple scenario. The hero first looks at n jewels and then takes the next best jewel. If none of the jewels that come up after the first n are better, he must settle for the last.
The results are striking! If he doesn’t look at any jewels and always pick the first one, he’s equally likely to get any of the jewels. That is, the chances of picking the best one are 1/9. If he looks at one, discards it and then pick the next jewel which is better than any of the discarded, the chances of picking the best jewel increase dramatically to almost 4 / 10! In fact, the entire distribution gets skewed right and the chances of picking the second and third best jewels also significantly increase.
But the hero is after the best. From the histogram above, it’s hard to see how many he has to see and discard to maximize the chances of picking the best one. For that we can either run a simulation with lots of jewels and lots of iterations. Or we can run simulations for increasing numbers of jewels and plot how many one has to look at, to maximize his/her chances of getting the best:
What this chart shows is that the number one needs look at and throw out to maximize the chances of finding the best grows linearly with the number of jewels. The slope of the line (0.36), indicates the fraction of the total number of jewels that we should examine before picking the next best.
The red line shows how many we one should look at to maximize the average value of the kept jewel. If we try and maximize the chances of bagging the best jewel, we also increase the chances that we end up with the worst. When trying to get the highest value on average, one should look at fewer options before deciding to stick with the next best.
What if the jewels are…?
But what if the values of the jewels are not uniformly distributed? What if most jewels are average in value and only a few are either precious or worthless? Or what if most jewels have a low value with only a few true gems? The next two sections show the results when the jewels are normally distributed (mostly average) and exponentially distributed (mostly low-value).
Moral of the Story
So what should we tell our king-saving friend?
As long as there’s more than one option and you want to get the best reward possible, always discard the first third (or 1/e‘th, where e is Euler’s Number, to be more precise) of the options and then pick the next one which is better than any you have seen so far. If you want something better than average but not necessarily the best, discard fewer. Or, to put it more succintly:
Acknowledgements
- Huge thanks to Steven Rudich for introducing me to the King's Jewels problem a long time ago during a summer lecture at the Andrew's Leap program at CMU.
- Thanks to Trent Richardson for the javascript implementation of a linear regression function.